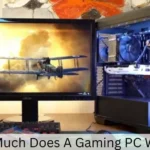

Building a PC can be a rewarding experience, offering the satisfaction of assembling a machine tailored to your specific needs.
Whether you’re a gaming enthusiast, a creative professional, or simply someone looking to upgrade their computing experience, building your own PC can provide significant advantages in performance, customization, and cost-effectiveness.
However, before diving into the assembly process, it’s crucial to ensure you have all the necessary tools and components.
This guide will walk you through the essential tools required for building a PC, along with some tips and best practices to make the process smoother and more enjoyable.
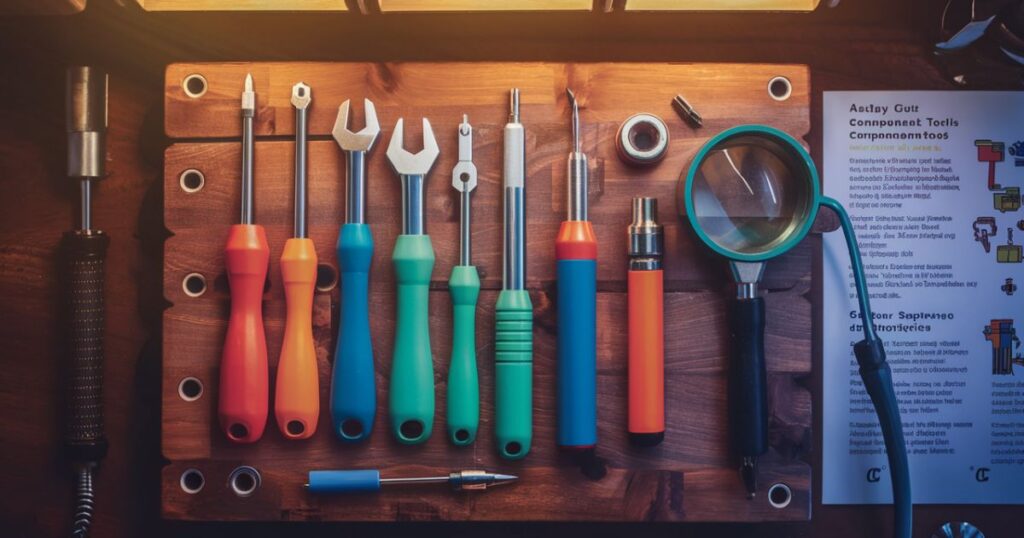
Essential Tools for Building a PC
1. Screwdrivers
Phillips Head Screwdrivers
A set of high-quality Phillips head screwdrivers is indispensable for building a PC. These screwdrivers come in various sizes, but the most commonly used size for PC building is the #2 Phillips head. This tool is used for securing the motherboard, installing the power supply unit (PSU), attaching storage drives, and mounting other components.
Precision Screwdrivers
In addition to standard Phillips screwdrivers, a set of precision screwdrivers with smaller heads (such as #0 and #1 Phillips) is useful for tasks requiring more finesse, such as securing M.2 drives or attaching small screws on certain components.
2. Anti-Static Wrist Strap
Electrostatic discharge (ESD) can damage sensitive computer components, so it’s essential to use an anti-static wrist strap to ground yourself. This tool prevents the build-up of static electricity that could potentially fry the delicate circuits in your CPU, RAM, or motherboard. The wrist strap typically has a clip that attaches to a metal part of the case, grounding you safely.
3. Thermal Paste
Thermal paste is crucial for ensuring efficient heat transfer between your CPU and its cooler. Most aftermarket CPU coolers come with thermal paste pre-applied, but having an extra tube is beneficial, especially if you need to reinstall the cooler or if you are using a custom cooler. Apply a small, pea-sized amount of thermal paste on the CPU before mounting the cooler to ensure optimal thermal conductivity.
4. Cable Ties
Cable management is essential for both aesthetics and airflow within your PC case. Cable ties help bundle and organize cables, keeping them out of the way of fans and other components. This not only improves the look of your build but also enhances its cooling efficiency.
5. Tweezers
Tweezers are useful for handling small screws and components in tight spaces. They are particularly handy when dealing with tiny screws for M.2 drives, fan headers, or other small connectors that are difficult to manage with your fingers.
6. Pliers
Needle-nose pliers are excellent for tasks requiring a bit more force or precision, such as bending metal tabs inside the case, removing stubborn components, or helping to route cables through tight spots.
7. Flashlight or Headlamp
Good lighting is crucial for seeing what you’re doing inside the dark confines of a PC case. A small flashlight or headlamp can illuminate the interior, making it easier to see screw holes, connectors, and other components.
8. Compressed Air
Dust can accumulate inside a PC case, especially if it’s been open for a while. Compressed air helps clean out any dust and debris from your components and case, ensuring that everything is clean and ready for assembly.
9. Magnetic Parts Tray
A magnetic parts tray helps keep your screws and small components organized and prevents them from getting lost during the assembly process. This is especially useful when dealing with numerous tiny screws that are easy to misplace.
10. Multi-Bit Screwdriver Kit
A multi-bit screwdriver kit with various interchangeable heads can be extremely handy, offering versatility and convenience in one tool. This kit often includes different sizes and types of screwdriver bits, allowing you to tackle various screws found in different components.
Optional Tools for Building a PC
While the essential tools listed above will suffice for most PC builds, there are a few optional tools that can make the process even more efficient and enjoyable.
1. Hex Key Set
Some cases and components use hex screws, and having a set of hex keys can make installation easier. These keys are also useful for certain aftermarket cooling solutions and custom water-cooling setups.
2. Cable Sleeving Kit
For enthusiasts who want their build to look as clean and professional as possible, a cable sleeving kit allows you to customize and manage your cables better. Sleeved cables not only look great but also contribute to improved airflow and organization.
3. Digital Multimeter
A digital multimeter can be helpful for troubleshooting electrical issues in your PC. It can measure voltage, current, and resistance, allowing you to diagnose problems with your PSU or other electrical components.
4. USB Flash Drive
A USB flash drive is essential for installing your operating system and transferring drivers and other necessary software. It’s also useful for BIOS updates or troubleshooting software issues.
5. External Hard Drive Enclosure
If you’re upgrading from an older PC and want to transfer data from your old hard drive, an external hard drive enclosure can be very useful. It allows you to connect your old drive to your new PC via USB, making data transfer simple and efficient.
Read More About: How Much Does A PC Weigh? The Ultimate Guide
6. Rubber Grommets and Cable Clips
These accessories help with cable management, providing additional options for routing and securing cables inside your case. Rubber grommets also protect cables from sharp edges, reducing the risk of damage.
Component-Specific Tools and Tips
Motherboard Installation
When installing the motherboard, ensure you have the correct standoff screws to elevate the motherboard from the case. This prevents short circuits and allows for better airflow. A magnetic screwdriver can be particularly useful here to avoid dropping screws into the case.
CPU Installation
Installing a CPU requires careful handling to avoid bending the pins (for AMD processors) or damaging the contacts (for Intel processors). Ensure you line up the notches or arrows on the CPU and socket correctly before gently placing the CPU into position.
RAM Installation
RAM modules are relatively straightforward to install. Ensure the notches on the RAM stick align with the corresponding tabs on the motherboard slot. Press down firmly until the clips on either side snap into place.
GPU Installation
Graphics cards are usually secured with screws at the back of the case. Ensure the card is properly seated in the PCIe slot before securing it with screws. Some larger GPUs might require additional support to prevent sagging.
Storage Installation
Whether you’re installing an SSD, HDD, or M.2 drive, ensure you have the appropriate screws and mounting brackets. M.2 drives often come with tiny screws that can be tricky to handle, so precision screwdrivers and tweezers are helpful here.
PSU Installation
The power supply unit (PSU) is typically installed at the bottom or top rear of the case. Secure it with the provided screws and ensure that the fan is oriented correctly for optimal airflow. Modular PSUs can help with cable management by allowing you to use only the cables you need.
Cooling Solutions
Whether you’re using air cooling or liquid cooling, ensure that your CPU cooler or radiator is properly mounted. For air coolers, make sure the cooler is securely fastened to the motherboard. For liquid cooling, ensure that the radiator is mounted securely and that the pump is properly connected to the CPU.
Building Process: Step-by-Step
Step 1: Prepare Your Workspace
Before starting, make sure you have a clean, well-lit workspace with plenty of room to organize your tools and components. Lay out an anti-static mat if you have one, and wear your anti-static wrist strap.
Step 2: Install the CPU
Begin by installing the CPU into the motherboard. Open the CPU socket lever, align the CPU correctly with the socket (following the notches or arrows), and gently place it in. Close the lever to secure the CPU.
Step 3: Install the RAM
Next, install the RAM sticks. Open the clips on the RAM slots, align the notches, and press the sticks firmly into place until the clips snap shut.
Step 4: Install M.2 Drives (if applicable)
If you have M.2 drives, install them now. Insert the drive into the slot at an angle, then press it down and secure it with the tiny screw provided.
Step 5: Mount the Motherboard
Install the standoffs in the case where the motherboard will be mounted. Carefully place the motherboard into the case, aligning it with the standoffs. Secure it with screws.
Step 6: Install the PSU
Place the PSU in its designated spot in the case. Secure it with screws and begin connecting the necessary power cables to the motherboard, CPU, and any other components.
Step 7: Install Storage Drives
Install your SSDs or HDDs in their respective bays. Secure them with screws and connect them to the motherboard and PSU with SATA cables and power cables.
Step 8: Install the GPU
Insert the GPU into the appropriate PCIe slot on the motherboard. Secure it with screws at the back of the case and connect any necessary power cables.
Step 9: Install Cooling Solutions
Mount your CPU cooler or radiator. For air coolers, secure them to the motherboard. For liquid coolers, mount the radiator in the case and connect the pump to the CPU. Ensure all fans are connected to the appropriate headers on the motherboard.
Step 10: Cable Management
Use cable ties, clips, and grommets to organize and route your cables neatly. Ensure that cables are not obstructing airflow or interfering with components.
Step 11: Double-Check Connections
Before closing the case
continue forwardChatGPT
Step 11: Double-Check Connections
Before closing the case, thoroughly inspect your work to ensure all connections are secure and properly seated. Check the following:
- Power Connections: Ensure that the 24-pin ATX power connector and the 4/8-pin CPU power connector are securely connected to the motherboard. Also, verify that any additional power connectors for the GPU and storage drives are properly attached.
- Data Connections: Make sure all SATA cables for your storage drives are connected both to the drives and the motherboard.
- Fan Connections: Confirm that all fans, including case fans and CPU cooler fans, are connected to the appropriate headers on the motherboard.
- Peripheral Connections: Verify that all USB, front panel, and other peripheral connectors are properly connected to the motherboard.
Step 12: Close the Case
Once you’ve double-checked all connections, carefully close the case. Attach the side panels and secure them with screws. Make sure that all panels are properly aligned and that no cables are pinched or obstructed.
Step 13: Initial Power-Up
With everything assembled and the case closed, it’s time for the initial power-up. Connect your monitor, keyboard, mouse, and power cable to the PC. Press the power button and watch for signs of life. Listen for any unusual sounds and check that all fans are spinning.
Step 14: Enter BIOS/UEFI
If the system powers on successfully, enter the BIOS/UEFI by pressing the designated key (usually DEL, F2, or F12) during startup. In the BIOS, check the following:
- System Information: Verify that the CPU, RAM, and storage drives are correctly recognized.
- Boot Order: Ensure that your boot drive (the drive where you will install the operating system) is set as the primary boot device.
- Fan Settings: Check and configure fan speed settings to ensure optimal cooling.
Step 15: Install the Operating System
Insert your USB flash drive containing the operating system installation files. Restart the PC and boot from the USB drive. Follow the on-screen instructions to install your operating system (such as Windows or Linux). During installation, you’ll need to partition your drives, select your primary drive, and complete the setup process.
Step 16: Install Drivers and Updates
Once the operating system is installed, install the necessary drivers for your motherboard, GPU, and other components. Most drivers can be downloaded from the manufacturer’s website. Additionally, run system updates to ensure your OS is up-to-date with the latest security patches and features.
Step 17: Install Essential Software
After drivers and updates are installed, proceed to install essential software and applications, including:
- Antivirus Software: Ensure your system is protected from malware and viruses.
- Web Browser: Install your preferred web browser for internet access.
- Utilities: Install utilities for monitoring system performance, managing files, and other tasks.
- Productivity Software: Install any necessary productivity software, such as Microsoft Office or Adobe Creative Suite.
Step 18: Perform Stress Tests and Benchmarks
Before declaring your PC build complete, it’s a good idea to perform stress tests and benchmarks to ensure system stability and performance. Use software tools like Prime95, AIDA64, or Cinebench to stress test your CPU, and tools like FurMark or 3DMark for GPU benchmarking. Monitor temperatures and performance to ensure everything is operating within safe parameters.
Step 19: Fine-Tune and Optimize
Based on the results of your stress tests and benchmarks, you might need to make some adjustments:
- BIOS Settings: Adjust BIOS settings for optimal performance, such as enabling XMP profiles for RAM or adjusting fan curves for better cooling.
- Cable Management: Make any final adjustments to cable management for improved airflow and aesthetics.
- Software Tweaks: Optimize software settings for better performance and stability, such as configuring power settings, disabling unnecessary startup programs, and optimizing game settings.
Step 20: Enjoy Your Custom-Built PC
Congratulations! You’ve successfully built and configured your own PC. Take a moment to appreciate your work and enjoy the enhanced performance and customization that comes with a self-built system. Whether you’re gaming, creating content, or simply browsing the web, your new PC is now ready to meet your needs.
Read More About: How Much Does A Gaming PC Weigh?
Tips and Best Practices
Plan Ahead
Before you start building, plan your build thoroughly. Research compatible components, read reviews, and ensure all parts will work together seamlessly. Use online tools like PCPartPicker to check compatibility and avoid potential issues.
Take Your Time
Building a PC is a meticulous process that requires patience and attention to detail. Take your time with each step to avoid mistakes and ensure everything is done correctly.
Stay Organized
Keep your workspace organized and clean. Use containers to keep screws and small parts from getting lost. Organize your tools and components to make the assembly process smoother.
Read the Manuals
Don’t skip the manuals. They contain valuable information about your components, including installation instructions, compatibility notes, and troubleshooting tips.
Handle Components Carefully
PC components are delicate and can be easily damaged. Handle them with care, especially the CPU, RAM, and GPU. Avoid touching the pins, contacts, or circuitry directly.
Test Components Before Final Assembly
If possible, test key components (like the motherboard, CPU, and RAM) outside the case before final assembly. This can help identify any DOA (dead on arrival) components and make troubleshooting easier.
Use Proper Cable Management
Good cable management not only improves the appearance of your build but also enhances airflow and cooling efficiency. Use cable ties, clips, and routing channels to keep cables neat and tidy.
Monitor Temperatures
Keep an eye on your system temperatures, especially during stress testing and gaming. Use software tools to monitor CPU, GPU, and case temperatures to ensure your cooling solutions are effective.
Regular Maintenance
Perform regular maintenance on your PC to keep it running smoothly. This includes cleaning dust from fans and components, updating drivers and software, and checking for hardware wear and tear.
Troubleshooting Common Issues
PC Won’t Power On
- Check Power Connections: Ensure all power cables are securely connected, including the 24-pin ATX, CPU power, and GPU power cables.
- Verify PSU Switch: Make sure the PSU switch is turned on.
- Inspect Power Button Connections: Check the power button header on the motherboard to ensure it’s correctly connected.
No Display
- Verify Monitor Connection: Ensure the monitor is correctly connected to the GPU and powered on.
- Check GPU Seating: Confirm that the GPU is fully seated in the PCIe slot and secured with screws.
- Reset BIOS: Try resetting the BIOS by removing and reinserting the CMOS battery or using the BIOS reset jumper.
Overheating
- Check Cooler Installation: Ensure the CPU cooler is properly mounted and that thermal paste is applied correctly.
- Improve Airflow: Adjust fan placement and cable management to enhance airflow within the case.
- Increase Fan Speeds: Adjust fan curves in the BIOS or with software to increase cooling performance.
Component Recognition Issues
- Re-seat Components: Re-seat the RAM, GPU, and storage drives to ensure they are properly connected.
- Update BIOS: Check for BIOS updates that may improve component compatibility.
- Check Compatibility: Verify that all components are compatible with your motherboard and each other.
Performance Issues
- Update Drivers: Ensure all drivers, especially for the GPU and motherboard, are up-to-date.
- Check Background Processes: Disable unnecessary background processes and startup programs.
- Optimize Settings: Adjust software and game settings for better performance, balancing between quality and performance as needed.
Conclusion
Building your own PC is a highly rewarding endeavor that offers a deep understanding of computer hardware and customization. By equipping yourself with the right tools, planning your build carefully, and following a systematic approach, you can create a powerful, efficient, and personalized computer.
Whether you’re a seasoned builder or a first-time enthusiast, the satisfaction of assembling a custom PC is unmatched. Enjoy the process, learn from each step, and revel in the performance and capability of your new system.